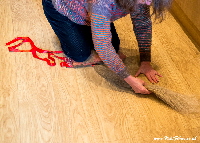
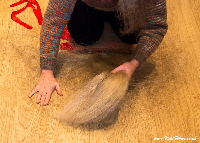
In the previous section, we covered preparing the flax for the distaff. This page covers fanning the flax and dressing the distaff. The photos show fanning the flax on the floor but the process is similar for fanning the flax on the lap or table.
i) Prepare the flax strick (previous page)
ii) Choose the most suitable distaff dressing method (previous page)
iii) Fanning the flax for the distaff
iv) Dressing the distaff
iii) Fanning the flax for the distaff
You will be spreading the flax fibres in a fan shape in front of you, but the fan-shape will be more than 180 degrees (up to 240 degrees).
|

|
|
starting to fan the flax
|
|

|
|
fanning from the right
|
|

|
|
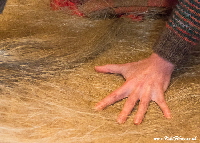
patting down the fibres
more photos below!
|
|
1. Start with the strick on your left side and hold it loosely in the middle with your right hand.
2. Slowly move the strick in an arc to your right side, with your right hand leading the way. At the same time use your left hand to pull out a very fine layer of fibres (a few fibres at a time) as you move the strick with your right hand. Pat them down with the palm of your left hand. The hand that is patting down the strick creates resistance, which helps to pull fibres out of the strick. The trailing hand anchors the fibres as the leading hand drags the bundle around the arc.
3. When the strick reaches your right side, turn it over and hold it with the left hand. The left hand then leads the way whilst the right hand pats down the anchored fibres. You always draw from the same edge (the trailing edge, not the leading edge as you might expect), this is why you turn the strick over at the end of the fan. To make it easier at change over time, lift the strick upwards, just before turning the strick round.
4. Make gossamer thin layers on each pass, adding layer upon layer. This is why it takes some time to fan the flax. You are aiming for a criss-crossing of the fibres; the flax should not form straight lines. This makes it much easier to spin as you will not encounter clumps of fibre when you draft. Fan slowly and carefully all the way along the strick, not just the ends.
5. Make sure you go all the way up and down the strick, leaving no ‘nests’. Your arms are probably not long enough to reach all the way to the tip of the strick, so gently flick the tip to tease the fibres apart. If the fibres clump, stop and open them up. Remove any knots.
6. When you have finished fanning the flax, undo the knot at your waist and on the flax, and then dress the distaff as explained below.
iv) Dressing the flax distaff
Place the tip of distaff against the point on the fan where the ribbon was tied. Carefully arrange the fanned flax around the distaff like a wrap-around skirt, with about 180 degrees of overlap. [If you are fanning the flax on your lap, you will need to carry the fanned flax to the distaff, and wrap the flax around the distaff.]
Fold the ribbon in half, and make a slip knot through the middle. Tie the knot once or twice very close to the tip of the distaff. Criss-cross the ribbon first away, then towards you. Tie a bow knot at the end. The ribbon needs to be tight enough for the flax not to fall, but not too tight. If it is too tight, the fibres will not slide easily. If your distaff is hollow, tuck the bottom of the flax skirt under it.
Dressing a Flax Distaff - gallery of photos (click to enlarge!)
Back to Previous page:
i) Preparing the flax strick for the distaff
ii) Choosing the most suitable distaff dressing method
And Back to
a) Making a cone distaff
b) Spinning flax from a distaff (in preparation)
And Growing your own Flax.
Top of page
|

